Sunday, March 23, 2014

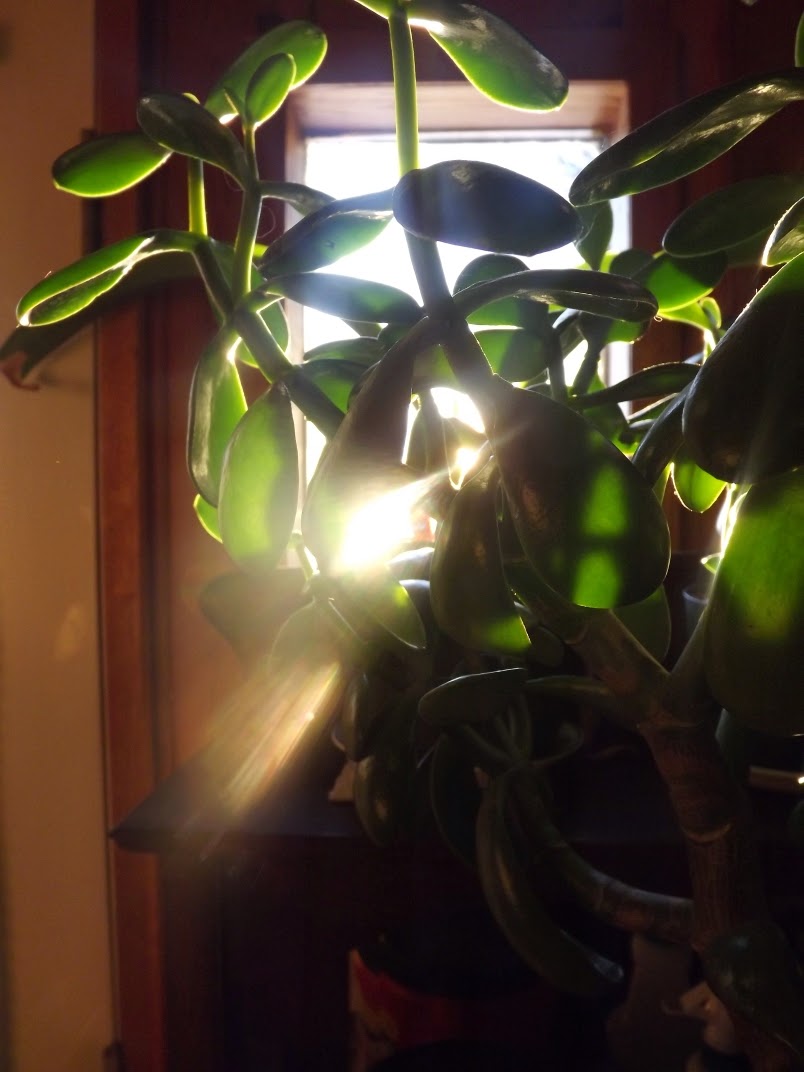
Sunlit Sunday: Inside


This one was taken by N- I was impressed- I love the reflection on the table.
Spring Schming, this week it was still winter -27 with the wind chill! we did go outside- but it was very cold- and the snow is still so... there... the garden is covered by at least 4 feet of snow in some spots- it's slightly depressing. So Inside shots it is- the sun was shining a few days at least- and we took advantage of the sunbeams in the house to play in and to start a bit of spring cleaning- which feels good- it would feel better if I could actually open the windows to air things out- but whatever... Murphy's oil soap smells good too.

Linking up to Sunlit Sunday at My Little Home and Garden

Friday, March 21, 2014

This Moment


{this moment}
A Friday ritual. A single photo - no words - capturing a moment from the week. A simple, special, extraordinary moment. A moment I want to pause, savor and remember. If you're inspired to do the same, leave a link to your 'moment' in the comments for all to find and see.- Amanda Blake Soule

Thursday, March 20, 2014

Kids in the Garden: String for the Birds


It's the Spring Equinox today- and we like to mark these days a little bit at least, bring the seasons into our life in a real way- and teach the kids to be a bit conscious of it at the very least. It's a cool thing that the days and night change in our part of the world, and I think we should notice it, if not celebrate it. I suppose they change in most parts of the world- except the equator- and that's always in our discussions of why we could never move to Hawaii- we like the fact that the days are shorter in winter and longer in summer*.

Anyways we decided to mark today with a little tribute to the birds- a basket full of soft nesting materials, which they can use to build nests- fitting for the first day of spring I think.

Step 1: Gather supplies- yarn, string, hair, thin strips of cloth, all cut 4 to 6 inches in length. Cat hair, dust bunnies, soft batting, and roving are all good too.


 Step 2: Prepare all the materials, talk about how the birds will pick things up, how wide do the kids think the fabric needs to be- how big do the clumps of stuffing should be.


Step 3: Stuff it into the basket- I used an empty free hanging Suet basket- though I think you could also just hang a bunch of stuff from a tree- loosely tied around the middle. My basket was 4 dollars though and we'll use it again and again.


Step 4: Hang the basket from the trees outside and watch the birds build nests- you can probably identify some of the string if you happen to see it in nests later in the summer.


I think we'll probably have this basket hanging for a while before it sees too much use. It's still too cold here for Robins- but once they come they'll use tons of nest building supplies. It's still a nice way to mark the Spring Equinox though. Here are some links related to birds and nest monitoring- Project Nest Watch, BioKids, Birds Nest Safari- Highlights


* We just learned the other night that originally clocks in England made the hours longer during a winters night, and shorter during a summer night- that's how they figured it out- so the sun would always set and rise at the same time- but the hours were not a consistent amount of time. Midnight in January would just drag on and on eh?


Linking this post up to Green Thumb Thursday over at Little mountain Haven- if you're stopping by from there leave a note in the comments- I'd love to hear from you!

Monday, March 17, 2014

Monday Inspiration: Doris McCarthy

Doris McCarthy, Hills at Dagmar, 1948, (source)

Doris McCarthy, Wave Movement #8, 1969, (source)
Doris McCarthy in Nunavut, 1976 (source)
Doris McCarthy, Iceberg with Moon, 2002, (source)
Another Kick-Ass Canadian woman artist. Doris McCarthy was born in 1910- and died in 2010, which means that she painted Iceberg with Moon when she was 92 years old! I love that- it makes me want to live up to that standard. The paintings themselves are somewhat 'traditional' Canadian Landscapes- though there is a big breadth to her work- you can see that she stretched in both directions as a painter- experimenting on either side of her comfort zone.

I love the colourful exuberance of the Hills at Dagmar, and the way that the landscape sort of twists in that image- reflecting the rolling quality of the hills. I love how the waves are distilled to their bare minimum in Wave Movement #8. In Iceberg with Moon, the Icebergs are so solid looking and yet slightly transparent, and also sliding slowly into the sea- it's a wonderful commentary on the solid impermanence of them.

Plus look at the image of her bundled up- painting icebergs in Nunavut, in the 70's- I mean really does it get more Iconically Canadian than that?


(for the most adorable elderly lady painter picture go here- awesome!)

Sunday, March 16, 2014

Sunlit Sunday: Slowly


 Not so much sun here this weekend- it's suddenly cold again- and the pictures I'd  planned on taking for Sunlit Sunday this week (outside tapping maple trees) didn't happen- thanks to -27 windchill. Oh well- it'll warm up someday- in the meantime I'm reveling in the smell of wet dirt out in the front porch, and checking daily to see if anything's coming up. Enjoying the tiny citrus tree that's sprouting leaves, adoring the baby belly that's been hanging around menacing the plants- (that low level is so tempting to little fingers). Noticing the lovely lacy edges on the horseradish plant- which will be lost in the madness of summer, when it gets planted out among showier things- and is surrounded in a sea of green.

And so quietly, quietly, spring is edging it's way closer. I always want it to barge in, and fill the world with warmth and growth, but that's just not the nature of spring is it? It is more of a quiet unfurling, a gentle rain that slowly fills the cup.


Joining in again for Sunlit Sunday over at My Little Home and Garden.

Thursday, March 13, 2014

In the Garden: Canadian Seed Companies


The snow is melting... Really... N is slightly unhappy with this...she's the only one...The front porch- where we start seeds- is nice and warm now- and eggplants and peppers and celeriac are starting to poke up through the dirt, the winter sown stuff is all done, and it is definitely time to get planning this garden again.

A couple of years ago Monsanto bought Seminis seeds- you can read more about it here - and I decided to only grow heirloom varieties. We mostly stick to that,  I love the idea of eating vegetables that have been around for ages, and believe it or not they do all taste a little different- which is a revelation. I also buy sustainably produced seed as much as possible. Sustainable is different from organic- though most sustainable seed growers use organic methods- they might not be certified organic, which is just politics really. Buying from small seed companies, that grow their own seed, and don't just bulk buy seed and package it in their own envelopes, is a way to support small farming and local businesses. Plus if you buy the seed from the person who gathered the seed- you can be sure that you're not buying from a big nasty company- so it's Monsanto proof.

The personal is political after all- and the more we support a better agriculture with our wallets the better the world will be. Often the seeds are not as cheap as they would be in Walmart, but you're paying for quality- they are most likely to germinate-plus- if they don't you have an actual person to talk to about it- who will actually care that your eggplant seeds didn't produce. And really is 3.95 too much to pay for a years supply of carrots or squash?

We've also ordered from Baker Creek seeds in the past- and they are superb- I love that you can write a review of the seeds right on their page and the selection is phenomenal- but they aren't local to me- so I've been trying to find good Canadian companies to buy seed from- and there are a ton out there. These are the five that I've bought from or am planning to buy from this year:

 T&T seeds: Located in Winnipeg- they are a good source of fruit trees and perennials- but we've had some bad luck with their stuff dying in the second year. They do supply mostly zone 3 hardy varieties, which is nice because you won't find things like rosemary listed as perennials (everything is perennial somewhere, just probably not here) and they have lots of ornamentals- some hard to find ones as well- Snakeroot and Big Bluestem.

Salt Spring Seeds: Located on Salt Spring Island (a.k.a the closest place to heaven in Canada), most of the seeds are produced by them, they have a good selection and great service. I bought lots of medicinal herbs and edible flowers from them, but you have to be careful about the perennials- because of course when they say hardy- they mean to balmy British Columbia standards.

Richters: Located in Ontario- it has the polish of a big seed company- but it is a family run business- huge selection- huge. You can buy seeds, plugs, plants, or dried material from most of the herbs they offer. They also have mushroom plugs.

Heritage Harvest Seeds: Located in Carmen Manitoba. They have a great selection of Heirloom seed, they also grow the seeds themselves. It's mostly vegetable seeds- the Bean and Tomato selection is enormous, but they do have some nice old fashioned flowers and herbs too.

Boughen Nursaries: Located in Valley River Manitoba. They're an older family run nursery, and they've got great selection too- lots of hardy apple varieties, and fruit trees, they also have some nice perennials, and non-fruit trees too.

Do you have a great Canadian seed company that you swear by? Let me know in the comments.

Linking up for Green Thumb Thursday at Little Mountain Haven.

Wednesday, March 12, 2014

Work in Progress Wednesday: Grog tests


The only work being done this week in my studio is grog tests for tiles. It's not too exciting- though it is exciting to see the pattern play out over more than one tile (the bottom left hand corner has one wonky tile from the first mold I made- I just used it to get done a little quicker- it's total crap- so happy I squared things up). So you can see how the pattern will repeat- I'm pretty pleased with it- though the real test will come after it's glazed.

Okay let's get a little technical- I'm using Plainsman M390 clay for these tiles- mainly because it's what I use for everything else- it's a good plastic clay- that holds up well to hand building, and is really white once fired so it looks good with bright colour glazes. I'd like the tiles to be glazed with my regular glazes- so I don't have to worry about testing and formulating new glazes- so M390 it is. The only thing about this clay is that it's not grogged- and non-grogged clay leads to warping and irregular shrinking, and it's tougher to work with as a tile. So I'm opting to try and add fine grog (fired clay dust basically) to the M390.  I'm also trying out some homemade paper clay (by wedging 1 ply toilet paper into the wet clay).

My method for adding the grog is to wedge it into wet clay- I know this makes my measurements a bit off percentage-wise- by adding dry grog to wet clay instead of dry grog to dry clay- I'll end up with a higher grog percentage, But all my percentages will be higher- so when I say 5 percent it's probably closer to 7, 2.5 closer 3.5 etc. Also I don't want to go to the trouble of mixing my clay from dry- unless I have to- I think it's safer for my lungs to work with the grog if I incorporate into wet clay because it's less dusty.

I started with 10 % dry grog ( 100 g grog - 1000 g wet clay) It was difficult to wedge in, and not very plastic, the clay got very dry, fast, it was unworkable.  I diluted the 10% mix  down to 5% by adding another 1000g wet ungrogged clay. The 5% clay was slightly dry, but as a result it came out of the mold quickly, and it dried nicely, the 2.5 % was not as quick to unmold- but it was a bit smoother- and dried down more, the.75% was smoother still- but also not as quick to unmold- it was the most like working with plain M390.

So far I like the 5% the best; the tiles dried very flat- they felt more solid and thicker right from the mold- they could handle a bit of sliding and flipping without deforming. My only concern is on how the grog will fire- Straight from the bag it looks grey- and I wonder if I'll be left with grey flecks in the white tile. That's why I'm also trying Paper clay (clay with paper fibers in it)- which would undoubtedly fire white.

Also I'm using a trick to help the tiles dry flat- waxing the edges with wax resist- so that they dry more slowly than the center. This works great for me, I've gotten the plain M390 tiles to dry flat with waxed edges and careful covering- but I'd rather have a sturdier clay mix so it's not as finicky. Next I'll get my paper clay samples done, and then make a bunch of stuff to fill the kiln so I can get firing these guys.